Sunday, 22 March 2015

DIY: Easter Eggs under $5

Easter is one of my favourite holidays mainly because for me Easter is a chocolate binge eating fest. Easter for some people also mean the hefty price tag on some chocolate delights. I however feel that we can enjoy Easter without having to break the bank.


Today I'm going to show you how to WOW your friends with these custom made Easter eggs. This is an amazing way to get your kids involved or provide yourself with a creative outlet. The cost is the best part... 10 solid eggs for around $28. If you want to make it a bit fancy , buy a cute Teacup to hold your Easter egg.


Custom Easter Egg in a Teacup (Victoria's Basement $3)

What you need:

- A selection of your favourite sweets (budget $5 and whatever is in your pantry)
- Candy Melts (your choice of colour $5 each online)
- Chocolate melting buttons ($4 per bag)
- Silicon Easter Egg moulds (around $4)
- Wide paint brushes

What to do :

Step by Step in Pictures

My selection : Chopped caramel cookies, jelly beans, salted peanuts, chopped jelly snakes, salted caramel (recipe from my edible gifts blog), chopped snickers, peanut butter and sprinkles

This selection is perfect for kids, for an adults version go for things like (Nuts, salted caramel, brittle, dried orange, coconut...)

The silicon egg mould (for easy release ) and paint brushes to paint the first layers on


2 candy melts (red and white) and dark chocolate for the filling (candy melts have a vanilla taste and hardens better than normal eating chocolate) - melt the candy melt and chocolate in 30 second intervals in the microwave mixing each time, max 1.5 min)


Painting the first layer (the layer you paint first is the one you will see on the outside)

The white candy melt layer (this makes up the "shell" of the chocolate egg)

Add your desired fillings ( my favourite is filling is peanuts salted caramel and peanut butter)

Ensure you put a lot of filling in , this will make it more exciting and decadent.

Now fill in the rest of the mould with chocolate. Then place the mould in the fridge to speed up the chocolate hardening process.  

Once the chocolate eggs have dried (approx. 1-2 hours in the fridge) unmould one half and stick to the other half with chocolate (allow it to set before you pull the whole egg out)

The chocolate egg is now ready for gifting... oh and of course you need to taste test them !!


Enjoy

xx Mel.

Sunday, 15 March 2015

DIY: Hanging Pot Plant - Under $10

When I first moved into my little unit the owners had left behind this big trough like pot with a succulent plant growing in it. Needless to say it was an eyesore! the pot was cracked and breaking and the plant inside refused to die. We did not water or pay any attention to the plant and it still remained luscious and green.


I decided after seeing that plant thrive with no attention whatsoever that it was time to get rid of the ugly big pot and give the plant a new home.


I made my own hanging pot plants that cost next to nothing yet looks amazing. Hung around the balcony it gives my home and whimsical and calming vibe.


The Pot Plant left behind by the previous owner and the hardy Succulent plant

DIY hanging pot plant from a recycled plant.

What you need:

Jute Twine in Natural (Approx. 7m per pot plant) $3-4 per 100 m
Small Pot (I got mine from IKEA for $3.99 each, if you are on a tighter budget there is a similar white pot for 99cents)
Scissors
Sticky Tape

What to do :

Step by Step in Pictures :

Take your Twine and loop 8 x 80cm long pieces - make sure one end is all loops (should be 4 loops)

Tie knots first one around 15cm from the top loops and second one 10cm from the first knot

Tie 4 small knots each with 2 strings (20 cm down from the second knot, make sure each knot is equal lengths from the top)

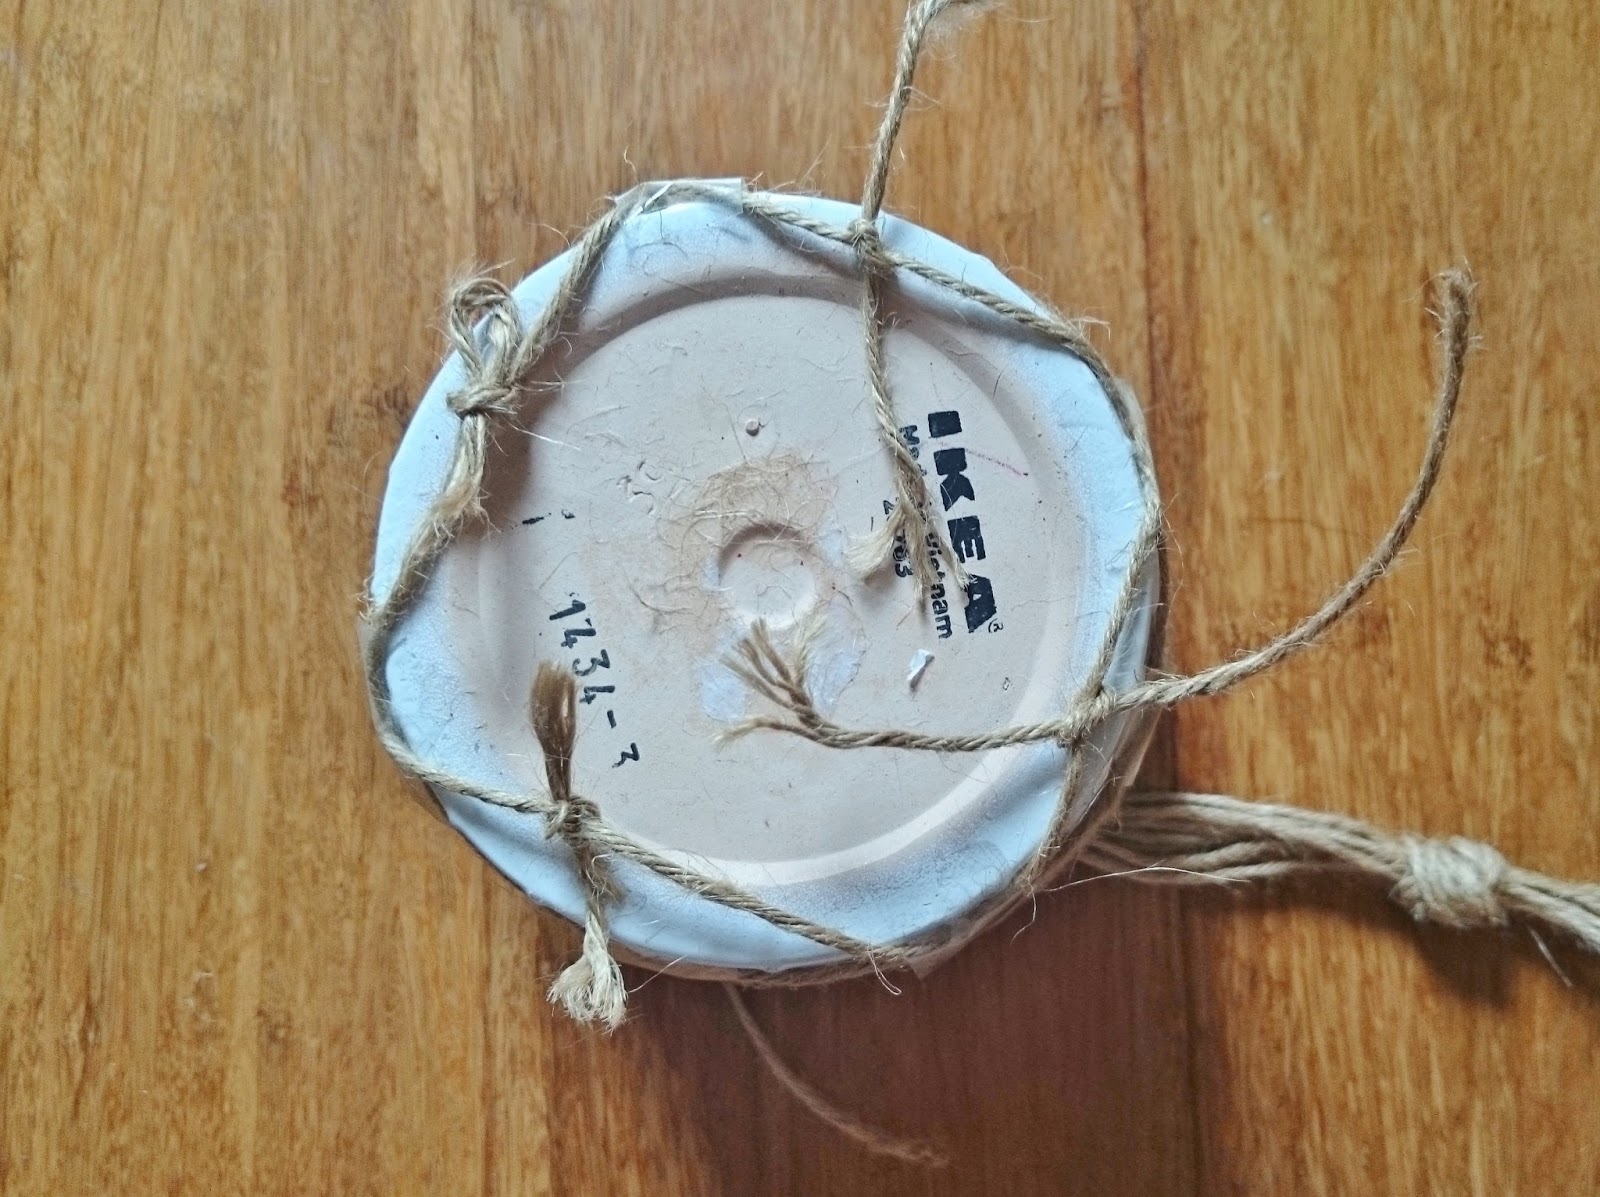
Using sticky tape , secure the small knot just above the top lip of the pot. make sure all 4 are equally spread apart.


Now take adjacent strings and loop them around each other twice. Do this to all adjacent strings and sticky tape them down.

Repeat this step again lower down on the pot. Again with adjacent strings to create a diamond pattern. Tape it down.

Repeat the step again even lower down on the pot. This creates a net like structure that will hold the pot in place when it is hanging


Now tie the strings that are next to each other. This will secure the patterns you have made.

Take the extra lengths of string from the bottom and tie them to the opposite strings (this will secure the bottom and allow the pot to be held without falling through)

If you want the bottom to have a tassel just add extra lengths of string and tie it to the middle , then fray and unravel the twine

Then add the soil from the old pot plant, take cuttings from the succulent and stick it into the soil. Succulents are very hardy and you can grow a new plant from cuttings (make sure you remove all the sticky tape too!)


I have seen very similar hanging pots online for over $30  and with a fancier pot over $60. Why pay for something you can make yourself for under $10!


For a more interesting look you can also use large noodle bowls like I have below.


Hanging plant with a Chinoiserie noodle bowl from Victoria's Basement for $6. I also used some wooden beads. You can find these at a bargain store for around $2

This project is also very child friendly, grab some plain plastic pots so if they drop them it wouldn't break . Let your child paint the outside of pots with some acrylic paint and let them plant their own succulents. These could be hung inside their rooms for them to show off their masterpiece with next to no maintenance !


Enjoy


xx Mel